Post-Construction Cleaning Checklist: Complete Guide for Portugal
An effective post-construction cleaning follows five essential phases: rough removal, technical cleaning, floor treatment, fine finishing, and final inspection. Skipping a phase is the most common cause of rework, especially when cement dust mixes with water before being vacuumed, creating an abrasive paste that is difficult to remove without scratching surfaces.
Before rolling up your sleeves, it’s worth deciding if the project justifies hiring a professional team. Renovations involving demolition, extensive painting, or installation of new flooring generate fine dust in quantities that a household vacuum cannot filter, and Article 86 of Decree-Law No. 136/2014 holds the property owner responsible for cleaning the space before provisional acceptance.
The essential checklist to start today:
- Remove debris, packaging, and leftover materials.
- Vacuum with appropriate filter equipment before any contact with water.
- Clean technical surfaces (countertops, tiles, glass) with specific products for each material.
- Treat the floors according to the type (wood, ceramic, vinyl).
- Perform fine cleaning of details: baseboards, switches, outlets.
- Conduct a final inspection with an acceptance checklist.
Hire professionals when:
- the project involved demolition or removal of walls;
- there is a risk of dust in ventilation systems or built-in appliances;
- the deadline for delivering the property is short and there is no room for errors.
Key Takeaways
A well-executed post-construction cleaning depends on the order of the phases, not just the products used, and Portuguese law holds the property owner responsible for this cleaning before provisional acceptance.
| Point | Details |
|---|---|
| Follow the five phases | Rough removal, fine vacuuming, floor treatment, finishing, and final inspection, always in this order. |
| Vacuum before wetting | Mixing water with cement dust creates abrasive paste that scratches new surfaces. |
| Comply with Article 86 | The property owner must clean the site before provisional acceptance, according to Decree-Law No. 136/2014. |
| Separate debris from regular waste | Construction waste and chemicals follow their own collection circuits in Portugal. |
| Hire professionals for extensive work | Cleaning Point offers checklists by division, a consistent team, and a digital report for post-construction cleanings in Lisbon. |
Index
- Phased post-construction cleaning checklist: steps and indicative deadlines
- What products and equipment to use for post-construction cleaning
- Checklist by division: what to check in each space
- How much it costs and how to request a quote
- Legal responsibilities of the property owner in Portugal
- How Cleaning Point organizes post-construction checklists
- How to save time and resources in post-construction cleaning
- How to deal with construction waste
- What practical experience teaches about post-construction cleaning
- Schedule a post-construction cleaning with Cleaning Point
- Sources
- Frequently asked questions
Phased post-construction cleaning checklist: steps and indicative deadlines
The order of operations is as important as the products chosen. Working from top to bottom and from rough to fine prevents spreading dust that has already been removed and reduces the number of passes on each surface.
Phase 1: rough removal
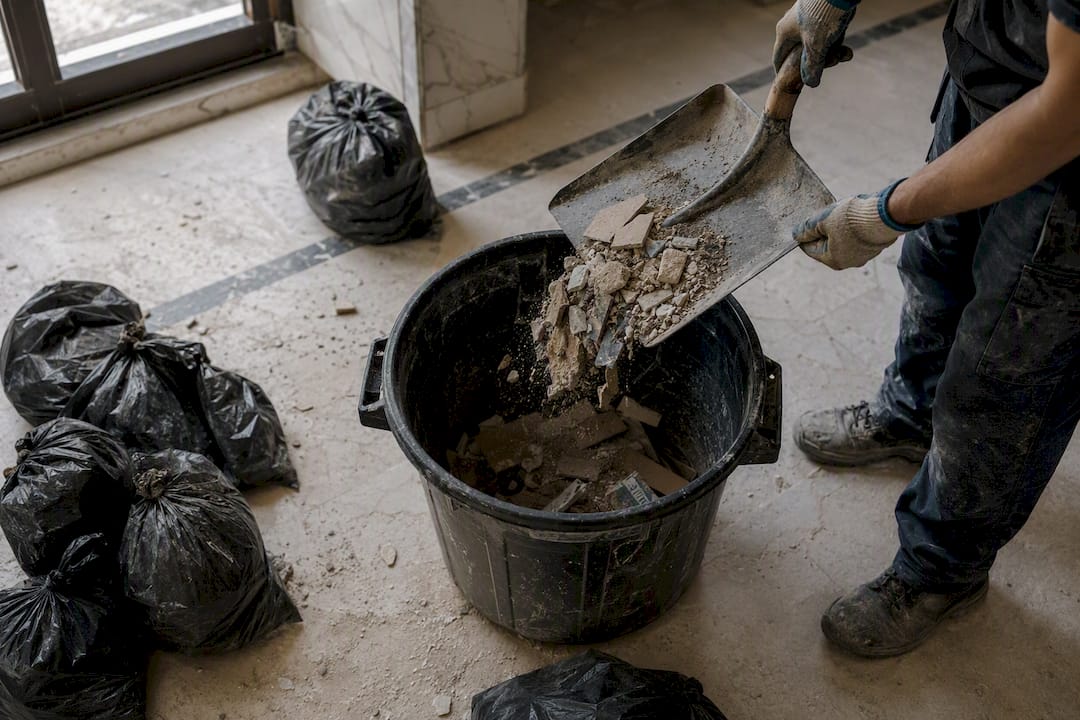
First, remove everything that doesn’t need cleaning, just disposal: empty cement bags, leftover piping, packaging from electrical materials, and cardboard protections used during the work. Separate construction debris from household waste right away, as they have different collection circuits. Do a first dry sweep with a stiff-bristled broom before touching any damp cloth.
Phase 2: technical cleaning and vacuuming
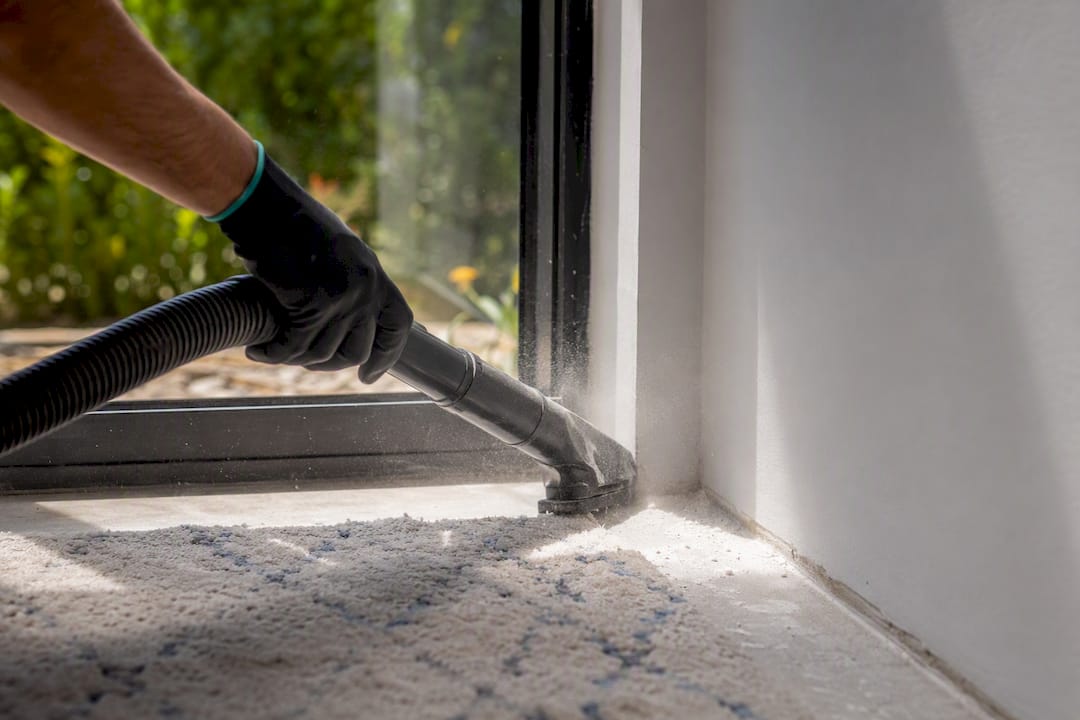
Here comes the most important equipment of the entire operation: a vacuum cleaner with a filter capable of retaining fine particles, usually referred to as a HEPA filter. Cement dust is alkaline and abrasive, and mixing it with water before vacuuming creates a paste that scratches delicate surfaces. Vacuum ceilings, walls, frames, and furniture before any wet cleaning. Only after removing the dust dry does it make sense to tackle paint or cement splashes with damp cloths and appropriate products.
Phase 3: floor treatment by type
Each flooring type requires different care:
- Ceramic and porcelain: neutral cleaner followed by rinsing; pay attention to the grout, which retains cement dust in the joints.
- Wood and laminate flooring: slightly damp cloth, never soaked, and ammonia-free products.
- Vinyl: avoid excess water in the joints to prevent the planks from coming apart.
- Newly applied floors: respect the curing time indicated by the manufacturer before intensive washing, usually between 24 and 72 hours.
Professional tip: if the flooring is new, test in a less visible area before applying any product throughout the room. A scratch or stain in a hidden corner is recoverable; the same mistake in the center of the room is not.
Phase 4: fine cleaning
With the bulk of dust and dirt removed, it’s time for the details that define the perception of a "finished job": streak-free glass, polished metals, baseboards without paint residue, switches and outlets clean without risk of water infiltration. Use microfiber cloths and specific products for glass and metals, and always turn off the power before cleaning outlets and switches.
Phase 5: final inspection
Walk through the property with a physical or digital checklist, room by room, checking:
- Absence of visible dust on horizontal and vertical surfaces.
- Glass and mirrors without streaks or adhesive residue.
- Drains and siphons unobstructed.
- Baseboards and corners without accumulation of fine dust.
- Functioning of switches and outlets without traces of paint or cement.
Points that fail in this phase enter the rework list and must be resolved before considering the work delivered.
What products and equipment to use for post-construction cleaning
The choice of product depends on the type of dirt and the surface, never on what is most at hand. Acid cleaners work well on cement residues but attack marble, polished granite, and some wood finishes. For these surfaces, always opt for neutral products.
Recommended products by situation:
- Cement and mortar residues: diluted acid descaler according to the technical data sheet, never applied pure.
- Fresh paint stains: specific solvent-based remover, tested first in a discreet area.
- Dirty grout: soft-bristled brush with neutral detergent, avoiding excess bleach that can yellow over time.
- Glass and mirrors: specific product for glass, ammonia-free in environments with films or recently tempered glass.
Equipment that makes a real difference:
- Industrial vacuum cleaner with HEPA filter for fine dust.
- Microfiber mops instead of conventional brooms, which only spread dust.
- Non-abrasive brushes for grout and textured surfaces.
PPE is not optional: mask with an appropriate filter for fine particles, chemical-resistant gloves, and safety goggles. Always read the safety data sheet of the product before diluting, and never mix bleach-based products with ammonia.
Professional tip: keep the technical data sheets of the products used during the work. If an unexpected stain appears months later, knowing exactly what was applied saves time and avoids using an incompatible product.
Checklist by division: what to check in each space
Organizing the cleaning by division makes it easier to request comparable quotes and verify the delivered work. A detailed checklist by division reduces disputes at delivery, as both parties know exactly what was agreed upon.
Kitchen
- Inside cabinets and drawers, removing sawdust and dust accumulated during installation.
- Appliances inside and out, including refrigerator seals.
- Extractor hood and filters, where grease combined with construction dust forms a film that is difficult to remove later.
- Countertops and joints with walls, paying special attention to new silicone.
Bathroom
- Removal of silicone, mortar, and plumbing tape residues around toilets and sinks.
- Checking drains to confirm they are not obstructed with construction debris.
- Inspection of new seals looking for air bubbles or application failures.
Living rooms and bedrooms
- Clean baseboards throughout the perimeter, without paint residues.
- Inside closets and built-in shelves.
- Upholstery and curtains vacuumed, especially if exposed during months of work.
Glass and frames
- Tracks of windows and sliding doors, where fine dust accumulates.
- Removal of protective films and adhesive residues without scratching the glass.
Balconies and exteriors
- Collection of debris and leftover materials left by workers.
- Checking water drainage, often clogged with construction debris.
How much it costs and how to request a quote
The price of a post-construction cleaning mainly varies based on three factors: the condition of the property upon entry, the volume of debris still present, and the need for heavy equipment such as industrial vacuums. An apartment where rough removal has already been done costs significantly less to clean than a space with debris to collect and dust accumulated on all surfaces.
The most common pricing models in the market are charging per square meter, per hour of the team, or a fixed amount after a technical visit to the property.
Before closing any quote, always ask:
- Does the company have liability insurance?
- What PPE and equipment does the team use for fine dust?
- Is debris disposal included or charged separately?
- What is the estimated time for the entire property?
- Does the quote include a final inspection with an acceptance checklist?
An effective quote request can be as simple as: "I need post-construction cleaning for a T2 of 80 m², with a remodeled bathroom and kitchen, debris already removed, available from Monday. Can you provide a fixed price and deadline?" Sending this information right at the first contact speeds up comparable responses between companies.
Legal responsibilities of the property owner in Portugal
Portuguese legislation leaves no room for doubt regarding who is responsible for the final cleaning. Article 86 of Decree-Law No. 136/2014 requires the property owner to clear the site and clean the area after the completion of the work, as a condition associated with the issuance of a license and provisional acceptance.
In practice, this means that the municipal chamber can condition the acceptance of the work on proof that the space has been cleaned and the site cleared.
To fulfill this obligation without surprises:
- Document the state of the property before and after cleaning, with dated photographs.
- Agree in writing with the contractor who handles debris removal and who handles fine cleaning.
- Confirm with the municipal chamber the specific requirements for provisional acceptance before scheduling the final inspection.
How Cleaning Point organizes post-construction checklists
Cleaning Point works with detailed checklists by division, a consistent team, and multilingual support, making it easier to coordinate post-construction cleanings in properties where owners are not always present in Portugal. Access management and the digital report after the service allow for remote confirmation that the final inspection was completed point by point.
- Specific checklists by division, aligned with what was agreed in the quote.
- Digital post-service report for remote validation.
- Coordination of access when the owner is not present at the delivery of the work.
How to save time and resources in post-construction cleaning
Planning the sequence of work avoids repeated passes over the same surface, which is where the most time is lost in post-construction cleaning. Always start with the room with the most accumulated dust, usually the one that had demolition or material cutting work, and leave for last the spaces that underwent less intervention.
Working in teams with tasks divided by specialty, instead of one person going through the entire property alone, significantly reduces total time. One person dedicated to vacuuming while another prepares the products for the next phase avoids downtime between steps.
Reserve the right equipment before starting. Looking for a vacuum with an appropriate filter in the middle of cleaning, or realizing that a specific product for grout is missing, forces you to interrupt the work and spreads dust that has already settled. Make a list of materials the night before, based on the checklist by division.
Light each space well before considering a surface finished. Fine dust on walls and ceilings only becomes visible with strong side lighting, and it’s common to consider a job finished that still has visible residues in daylight. A portable work light solves this in seconds and avoids having to repeat the final inspection.
How to deal with construction waste
Separating debris from regular household waste is not just good practice; it is also what most municipalities in Portugal require for proper collection. Cement leftovers, broken tiles, piping, and paint packaging follow different collection circuits from unsorted waste, and often need to be delivered to ecocenters or through specific containers rented for the work.
Before post-construction cleaning begins, confirm with the contractor or the municipal chamber the intended destination for the accumulated debris. Leaving construction waste bags next to regular trash is one of the most frequent causes of condominium complaints and can delay the provisional acceptance of the work.
Paint cans, solvents, and chemicals used during the work are hazardous waste and cannot follow the normal collection circuit. Deliver them to an appropriate collection point, usually available at municipal ecocenters.
If the work generated large volumes of debris, negotiating a dedicated container in advance saves time for the cleaning team, allowing them to focus on fine dust and finishing rather than managing bags and bins.
What practical experience teaches about post-construction cleaning
The most common idea about post-construction cleaning is that it’s enough to "give a good general cleaning" at the end. This is not true. The most expensive mistake seen repeatedly is starting with wet cleaning before thoroughly vacuuming, which turns cement dust into a paste that gets embedded in grout and wood crevices.
The second wrong idea is thinking that post-construction cleaning is optional or negotiable with the contractor. It is not: Portuguese law places this responsibility directly on the property owner, and ignoring it can delay the provisional acceptance of the property.
What truly separates a professional result from an amateur one is not the product used, but the sequence of phases and the rigor of the final inspection. Many owners skip this last step out of fatigue, precisely when it matters most. If the budget or time is limited, absolute priority should be given to fine vacuuming before any water, and an inspection checklist that is not done "from memory".
Schedule a post-construction cleaning with Cleaning Point
Cleaning Point is the alternative to doing post-construction cleaning on your own in Lisbon: instead of buying HEPA equipment for one-time use, managing incompatible products with new floors, and risking rework, hire a team that already follows a checklist by division and knows how to distinguish marble from porcelain before applying any product.

The Signature Deep Cleaning covers exactly the phases described in this article: fine removal of accumulated dust, appropriate treatment for each type of floor, cleaning of glass and frames, and final inspection with a digital report. Additional services such as upholstery cleaning, oven, or exterior windows can be added to the package depending on the state of the work, available on the extras page.
If the work involved demolition, extensive painting, or installation of new flooring, professional equipment quickly compensates for the investment in time saved and risk avoided. Requesting a quote is simple: just schedule a cleaning and indicate the area of the property and the type of work done.
Sources
- Article 86. Cleaning the area and repairing damages
- Complete Post-Construction Cleaning: Professional Checklist for Companies and Residences
- Post-Construction Cleaning: Techniques, Care, and Recommended Products. - Cleaning Channel
Frequently Asked Questions
How to do post-construction cleaning step by step?
Start by removing debris and loose materials, then vacuum all fine dust before any wet cleaning, treat the floors according to the material, and finish with a final inspection using an acceptance checklist.
How to make a post-construction cleaning quote?
Describe the area of the property, the type of work done, whether the debris has already been removed, and the desired date, and always ask for confirmation about insurance, PPE, and whether the final inspection is included in the price.
How to clean tiles after construction?
First, vacuum the loose dust, then use a neutral cleaner for the tiles and a soft-bristled brush on the grout, avoiding acidic products on surfaces with sensitive finishes.
How much does an hour of post-construction cleaning cost?
The price varies according to the condition of the property, the volume of debris, and the need for specialized equipment, making it more reliable to request a fixed quote after a technical visit than to base the decision solely on an hourly rate.


