Cleaning the oven: natural, safe and chemical-free method

The safest and most effective method for cleaning the cavity of a domestic oven is to apply a paste of baking soda, let it act for a period that varies according to the degree of dirt, and finish with white vinegar in spray. Baking soda emulsifies burnt grease and softens crusts; vinegar reacts with alkaline residues, creating effervescence that loosens what remains and neutralizes odors. Together, they solve the vast majority of cases without toxic fumes or risk to the interior enamel.
Before touching the oven, three rules are non-negotiable:
- Unplug and wait for the cavity to cool completely (allow enough time for the cavity to cool completely after the last use).
- Never use steel wool, bleach, caustic soda or sprays applied directly to the heating elements or fan.
- Consult the manufacturer's manual before using any commercial cleaner or removing the door glass.
For very light dirt or quick maintenance, neutral detergent and a soft sponge are sufficient. For very ingrained and old grease, degreasing sprays like KH-7 or Ultra (available in supermarkets) speed up the process but require more care in application and rinsing. If the oven has a pyrolytic, catalytic or HydroClean function, these options save manual work, although there are caveats worth knowing before activating them.
Key Takeaways
The most effective and safe method for cleaning a domestic oven combines baking soda paste with prolonged action and finishing with white vinegar, without abrasives or aggressive chemicals.
| Point | Details |
|---|---|
| Main method | Baking soda paste (8–12 h of action) + vinegar spray for finishing and residue removal. |
| Mandatory safety | Unplug and wait 45–60 min before starting; never use steel wool, bleach or caustic soda. |
| Recommended frequency | Light cleaning after each use; complete cleaning monthly for ovens used three or more times a week. |
| Self-cleaning | Pyrolytic, catalytic and HydroClean complement but do not replace manual removal of solid residues. |
| Cleaning Point | For very dirty ovens or when you prefer to delegate, Cleaning Point offers deep cleaning in Lisbon with a photographic report. |
Index
- What materials and products should you have on hand?
- How to clean the oven step by step: the universal method
- Natural method or commercial product: when to choose each one?
- Do self-cleaning programs really work?
- How to clean grates, trays and the door glass
- What safety errors can damage the oven?
- How often should you clean the oven?
- How to remove burnt and very resistant crusts
- When is it worth hiring a professional service?
- Preventive maintenance is underestimated
- The clean oven without effort on your part: Cleaning Point service in Lisbon
- Sources
- Frequently asked questions
What materials and products should you have on hand?
Gathering everything before you start saves time and avoids interruptions during the process.
Natural ingredients:
- Baking soda (half a cup to one cup, depending on the size of the oven)
- White vinegar (in a spray bottle)
- Warm water
- Neutral dish detergent (a few drops)
- Lemon (optional, for odors)
Tools:
- Microfiber cloths (at least two)
- Non-abrasive sponge
- Plastic spatula or scraper
- Spray bottle
- Rubber gloves
- Large container or tub for soaking the grates
- Newspaper or old cloth to line the floor in front of the oven
Commercial products as an alternative: KH-7 degreaser and Ultra-type oven sprays are available in major Portuguese supermarkets and act more quickly on very ingrained grease. When using them, always apply to the cloth or sponge first, never directly in the cavity, and consult the manufacturer's manual to confirm compatibility with your oven's coating.
The baking soda paste should have the consistency of a thick cream: mix half a cup of baking soda with two to three tablespoons of warm water until you obtain a paste that does not run. Before you start, ventilate the kitchen by opening a window.
How to clean the oven step by step: the universal method
The complete sequence takes about 15 minutes of active work, plus the time for the paste to act. The step-by-step guide from Blog Fixo details the baking soda paste method with 8–12 hours of action and removal with a plastic spatula followed by vinegar for finishing.
| Step | Action | Time |
|---|---|---|
| 1. Preparation | Unplug, wait to cool, remove grates and trays | 45–60 min (cooling) |
| 2. Soaking the grates | Place grates in hot water with detergent and baking soda | 30 min to 2 h |
| 3. Applying the paste | Cover walls, ceiling and bottom with baking soda paste | 10 min |
| 4. Action | Let the paste act (light dirt: 30 min; intense dirt: 8–12 h) | 30 min to 12 h |
| 5. Removal | Scrape with plastic spatula, clean with damp cloth | 10–15 min |
| 6. Vinegar | Spray white vinegar, let fizz for 2–3 min, clean | 5 min |
| 7. Rinsing | Wipe with clean damp cloth twice to remove residues | 5 min |
| 8. Finishing | Dry, reassemble grates, air out | 5–10 min |

Detailed step by step:
1. Preparation. Unplug the oven and wait for it to cool completely. Remove the grates, trays and, if applicable, the bottom support. Soak them in a container with hot water, detergent and a spoonful of baking soda.
2. Prepare and apply the paste. Mix the baking soda with warm water until you obtain a thick paste. With gloves on, spread the paste throughout the interior cavity: side walls, ceiling and bottom. Avoid covering the heating elements, the light bulb and the fan. In areas with very accumulated grease, apply a more generous layer.
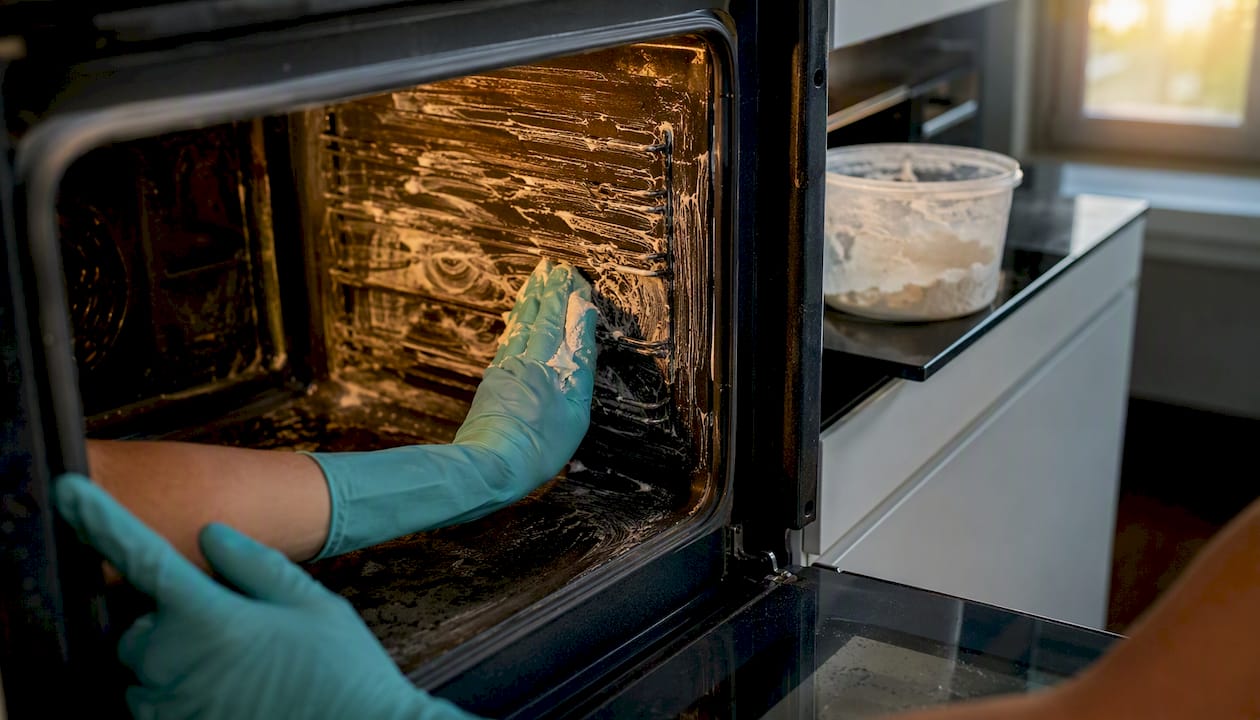
3. Action time. For light dirt, 30 minutes is enough. For burnt grease, let it act for 8–12 hours. The practical trick is to apply the paste at night and finish the cleaning the next morning, without rushing.
4. Removal. With the plastic spatula, gently scrape the softened crusts. Wipe with a damp cloth to collect the residues. Repeat until the cavity is free of visible paste.
5. Vinegar for finishing. Spray white vinegar over the entire surface. The effervescence that forms when reacting with the residual baking soda loosens the last residues and eliminates white traces. Wait 2–3 minutes and wipe with a clean damp cloth.
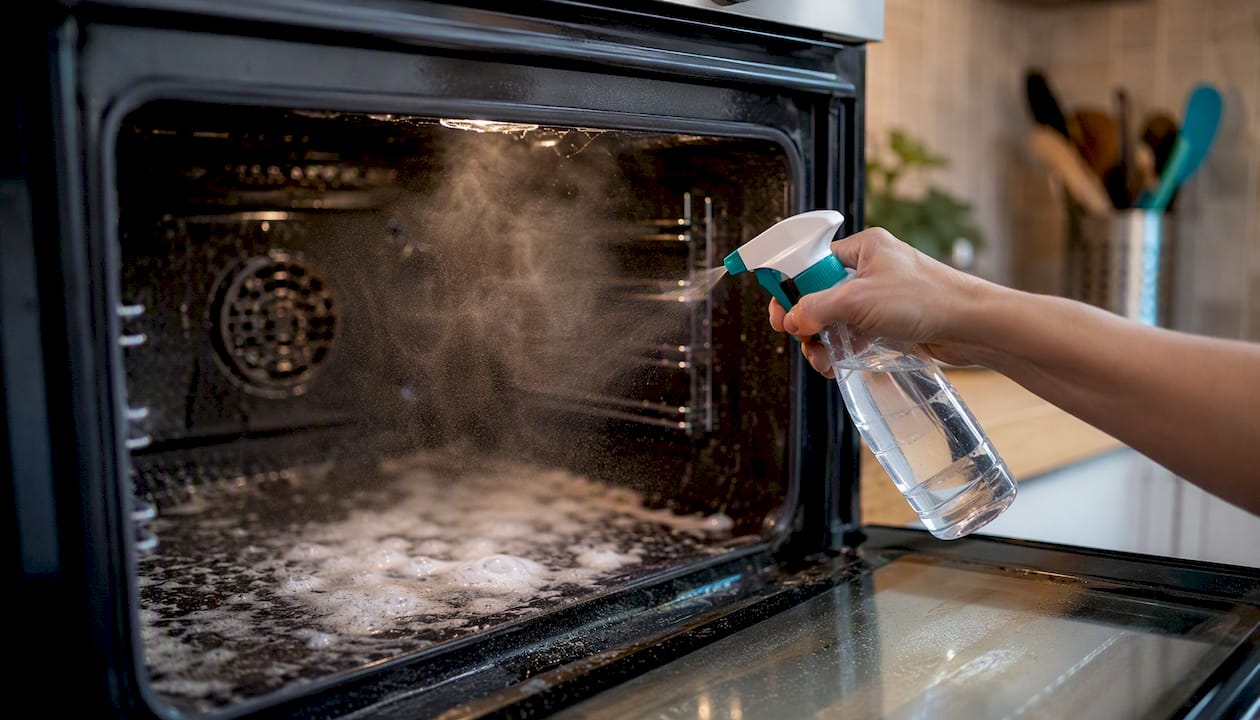
6. Rinsing and drying. Wipe with the damp cloth once more, this time only with clean water. Dry with a dry cloth. Leave the door ajar for 10–15 minutes to air out.
7. Grates and trays. Scrub with a non-abrasive sponge, rinse and dry completely before replacing. Wet grates rust easily.
Optional: Before cooking again, turn the oven on to 180 ºC for 10 minutes with the door closed. This eliminates any traces of vinegar or baking soda and confirms that everything is properly assembled.
Professional tip: Apply the paste at night on a Friday. On Saturday morning, removal takes less than 20 minutes and the oven is ready for the weekend.
Natural method or commercial product: when to choose each one?
The choice depends on the degree of dirt, the time available and the type of oven coating.
Natural ingredients, baking soda and vinegar, are technically recommended for being gentle on enamel and stainless steel and for not leaving chemical residues that could contaminate food in subsequent heating. A box of baking soda costs a fraction of the price of a commercial spray and solves most cases when the action time is respected.
Degreasing sprays, such as KH-7 or Ultra, act more quickly on very ingrained grease and are useful when there is no time for prolonged action. The downside is the strong odor, the risk of damaging seals or delicate coatings if applied incorrectly, and the need to rinse very well to avoid leaving chemical residues.
Golden rules when using commercial products:
- Always apply to the cloth or sponge, never directly in the cavity.
- Never spray on heating elements, fan or light bulb.
- Consult the manufacturer's manual to confirm compatibility.
- Ventilate the kitchen during and after application.
- Rinse the cavity at least twice with a clean damp cloth.
For ovens with catalytic coating (textured panels on the walls), avoid any aggressive chemical product and even excess baking soda. These panels clean themselves through oxidation during heating and can be damaged by scrubbing.
Do self-cleaning programs really work?
Yes, but each has its scope and limitations.
Pyrolytic (pyrolysis): Heats the cavity to temperatures between 400 ºC and 500 ºC, reducing grease and residues to ashes that can be collected with a damp cloth after cooling. It is the most effective method for intense dirt, but consumes considerable energy and takes between 1.5 and 3 hours. Before activating, remove the grates if the manufacturer indicates so, remove bulky solid residues and ventilate the kitchen well, as the odors during the cycle can be intense.
Catalytic: The coated panels absorb and oxidize grease during normal oven use, above 200 ºC. It does not eliminate solid residues or very accumulated grease. It requires that the oven be regularly heated to a high temperature for the process to work.
HydroClean / AquaClean (steam cleaning): Water (and sometimes specific detergent) is poured into a container at the bottom of the oven, which heats and produces steam to soften the grease. It takes about 30 minutes and is suitable for moderate and recent dirt. After the cycle, moisture is removed with a cloth. AEG describes in detail the differences between these programs and emphasizes the need to follow the manufacturer's manual for each function.
When to use self-cleaning:
- Pyrolytic: intense dirt, when there is time and the oven is in good condition.
- HydroClean: moderate and recent dirt, as a quick alternative to manual cleaning.
- Catalytic: passive maintenance; does not replace manual cleaning of other surfaces.
None of these programs replace the manual removal of solid residues before activating them. Bulky food residues can burn and create excessive smoke, especially in the pyrolytic cycle.
Professional tip: Never activate the pyrolytic cycle in an oven with visible damage to the enamel or door seals. Extreme heat can worsen existing cracks and compromise the safety of the appliance.
How to clean grates, trays and the door glass
Removable parts deserve separate attention because they accumulate grease differently than the cavity.
Grates and trays:
- Remove the grates and trays and soak them in hot water with detergent and a spoonful of baking soda for at least 30 minutes (up to 2 hours for intense dirt).
- Scrub with a non-abrasive sponge. For more resistant spots, apply baking soda paste directly and let it act for 15–20 minutes before scrubbing.
- Rinse well with running water.
- Dry completely with a cloth before replacing. Wet grates rust, especially cast iron ones.
Door glass:
- Check the manual to see if the glass is removable. Some models allow the panel to be disassembled for easier cleaning; others do not.
- For the interior glass, use a damp cloth with neutral detergent. TechTudo recommends neutral detergent and a soft sponge for routine cleanings, warning to be careful with tempered glass and seals.
- Avoid ammonia on tempered glass, unless otherwise indicated in the manual.
- For burnt grease stains on the glass, apply baking soda paste, wait 20–30 minutes and remove with a soft sponge.
Details that many people ignore:
- The interior light cover accumulates grease and can be cleaned with a cloth wrapped around a wooden stick or soft brush.
- The grooves of the grate guides retain residues; use a folded cloth or narrow brush to clean them.
- Check the condition of the rubber seals on the door. If they are dry or cracked, the efficiency of the oven decreases and they may need to be replaced.
What safety errors can damage the oven?
Most damage caused during cleaning results from two errors: using abrasives and applying liquids to electrical components.
Obligations before starting:
- Unplug from the electrical current (not just turn off the thermostat).
- Wait 45–60 minutes after the last use for the cavity to cool completely.
- Wear rubber gloves.
Prohibited products and tools:
- Steel wool and steel sponges: scratch the enamel irreversibly.
- Bleach: corrodes the coating and leaves toxic residues.
- Caustic soda: damages enamel, seals and metal components.
- Sprays applied directly to heating elements, fan or light bulb.
Electrolux warns that aggressive cleanings damage seals and internal components, shortening the lifespan of the appliance. Never apply products directly to heating elements or fans; always apply to the cloth to avoid infiltration behind sensitive electrical components.
Practical rule: if in doubt about whether a product is safe for your oven's coating, apply a small amount in a less visible area and wait 5 minutes before continuing. If the enamel changes color or texture, do not use that product.
For very old ovens, with visible damage or exposed electrical components, the safest option is to hire a professional service rather than risk a DIY cleaning.
How often should you clean the oven?
The answer depends on usage, but the general rule is simple: the sooner you clean, the less work you will have.
UAI Notícias recommends light cleaning of the internal walls and trays after each use and a deep cleaning monthly in cases of frequent oven use. For intense daily use, complete cleaning should be biweekly.
| Frequency | Type of cleaning | Estimated time | Action |
|---|---|---|---|
| After each use | Light cleaning | 5 min | Damp cloth on walls and bottom while still warm |
| Weekly | Intermediate cleaning | 15–20 min | Neutral detergent, soft sponge, soaking grates |
| Monthly (use ≥3×/week) | Complete cleaning | 45–60 min | Baking soda paste, prolonged action, vinegar |
| Biweekly (intense daily use) | Complete cleaning | 45–60 min | Same protocol, with attention to seals |
| Semiannually | Seal inspection | 10 min | Visual inspection of door rubbers |
Preventive habits that make a difference:
- Cover baking trays with aluminum foil or use trays to catch grease and liquids.
- Clean splashes while the oven is still warm (not hot). Fresh grease comes off with a simple damp cloth; burnt grease requires paste and hours of action.
- Place a tray on the bottom level when cooking dishes with a lot of liquid or grease.
TEKA emphasizes that prevention is the most efficient and economical way to maintain the oven: quick cleanings while the cavity is still warm prevent grease from carbonizing and reduce the need for deep cleanings. To keep all kitchen appliances in good condition, regular maintenance tips from Kitchen Devotion complement this routine well.
Professional tip: Keep the spray bottle with white vinegar next to the oven. After each use, while the oven is still warm (not hot), lightly spray the interior and wipe with a cloth. It takes two minutes and eliminates the need for frequent deep cleanings.
How to remove burnt and very resistant crusts
Long-standing burnt grease requires patience, not force.
Protocol for very ingrained dirt:
- Apply a generous layer of baking soda paste over the affected areas and let it act for 8–12 hours. For extreme cases, you can leave it for up to 24 hours.
- With the plastic spatula, gently scrape the softened crusts. Do not force: if it resists, apply more paste and wait longer.
- Spray white vinegar and wait for the effervescence. Wipe with a damp cloth.
- If stains persist, repeat the complete cycle. Correio Braziliense confirms that for very old burnt grease, repeating the cycle with baking soda or hiring a professional is the recommended way to avoid damage.
Additional techniques for difficult cases:
- Pre-steaming: Place a dish with water and juice from half a lemon in the oven at 180 ºC for 15–20 minutes. The steam softens the crusts and facilitates later removal.
- Wet coarse salt: In localized spots with very hard crusts, apply damp coarse salt as a gentle natural abrasive. Use with caution and only on enamel without visible damage.
When to stop insisting:
- If the enamel starts to chip or change color with scraping, stop immediately.
- If after two complete cycles of baking soda the dirt does not yield, the risk of damaging the coating outweighs the benefit of continuing.
- In these cases, the correct solution is a professional service with appropriate equipment.
When is it worth hiring a professional service?
There are situations where DIY cleaning is not the best choice, whether for safety, results, or simply lack of time.
Signs that justify hiring a professional:
- Very old dirt that does not yield after two cycles of baking soda.
- Oven with exposed electrical components, enamel damage or deteriorated seals.
- Need to disassemble the door glass for deep cleaning.
- Oven with intense use (home catering, holiday home with high turnover) that accumulates grease quickly.
- Preference for a guaranteed result without dedicating time to the process.
What a certified professional service should offer:
- Preliminary assessment of the oven's condition and identification of at-risk components.
- Clear list of included interventions (cavity, grates, trays, glass, seals).
- Use of safe products compatible with the appliance's coating.
- Report or photographic record of before and after.
- Service guarantee and availability to resolve issues after the visit.
Transparency in costs is a sign of quality: a clear budget that itemizes the base service and extras (replacement of seals, cleaning of additional components) avoids surprises. For those in Lisbon, Cleaning Point's deep cleaning includes oven cleaning as part of a complete residential service, with a verified team and detailed checklist.
Preventive maintenance is underestimated
There is a tendency to treat oven cleaning as an emergency task: it is only done when the grease is already carbonized and the smell starts to bother. This is the most labor-intensive path and the one that wears out the appliance the most.
The reality is that an oven cleaned regularly with gentle methods lasts longer, consumes less energy (accumulated grease affects heat distribution) and produces food without strange flavors. More than that: the baking soda paste applied at night and removed in the morning is genuinely superior to many chemical sprays in terms of safety and results, especially in ovens with delicate enamel coatings.
What I observe in homes with ovens in good condition is not a flawless monthly deep cleaning. It is the simple habit of wiping with a damp cloth while the oven is still warm, two or three times a week. This two-minute gesture prevents fresh grease from turning into burnt crusts that later require hours of work.
For those who prefer to delegate, a periodic professional service, two to four times a year, combined with light maintenance between visits, is the most efficient long-term solution. Kitchen Devotion's cleaning tips offer a complementary perspective on maintenance routines that work in everyday life.
The clean oven without effort on your part: Cleaning Point service in Lisbon
Cleaning the oven is laborious when the grease is already carbonized. For those who prefer a professional result without dedicating hours to the process, Cleaning Point offers deep oven cleaning as part of its complete residential deep cleaning service in Lisbon.

The team uses safe products for the appliance's coating, follows a detailed checklist that covers the cavity, grates, trays and door glass, and delivers a photographic report of the result. No surprises in the budget, no risk of damaging components. For those with a very dirty oven or simply value their time, it is the direct alternative to manual labor. Schedule your cleaning and receive a no-obligation quote.
Sources
To delve deeper or verify the recommendations in this guide, consult the following sources:
- To keep your electric oven efficient and grease-free, learn how to clean without damaging - UAI Notícias
- How to clean and care for your Electrolux oven
- How to clean and care for your AEG oven
- How to Clean Oven with Burnt Grease (Step by Step Guide) - Blog Fixo
- How to clean electric oven: learn how to wash inside and out - TechTudo
For technical instructions on disassembling doors or electrical components, always prefer official sources from the manufacturer or a certified technician. Generic guides found in forums may not be suitable for your specific oven model.
Frequently asked questions
How to clean the inside of the oven without chemicals?
Apply a baking soda paste with warm water throughout the interior cavity, avoiding the heating elements and the light bulb, and let it act for 8–12 hours. Scrape with a plastic spatula, wipe with a damp cloth and finish with white vinegar spray to remove alkaline residues.
How to effectively remove burnt from the oven?
For burnt grease, generously apply baking soda paste and let it act overnight. If the crust resists, pre-soften with steaming: place a dish with water and lemon at 180 ºC for 15–20 minutes before applying the paste.
How to perform self-cleaning of the pyrolytic oven?
Remove the grates if the manufacturer indicates, remove visible solid residues, close the door and activate the pyrolytic program according to the manual instructions. The cycle takes between 1.5 and 3 hours at temperatures of 400–500 ºC; after cooling, collect the ashes with a damp cloth and ventilate the kitchen during the process.
How to remove crusts from the oven without scratching the enamel?
Always use a plastic spatula, never metal or steel wool. Soften the crusts with baking soda paste for several hours before scraping; mechanical force should be minimal. If the enamel starts to chip, stop and consider a professional service.
How often should the oven be cleaned?
A light cleaning after each use and a complete cleaning monthly for ovens used three or more times a week. For intense daily use, complete cleaning should be biweekly.


