Grimy Grout: Homemade Methods That Really Work

For most grimy grout, the first step is this: sprinkle baking soda over the damp joints, spray white vinegar on top, wait 10 minutes, and scrub with a nylon brush. Rinse with warm water. In many cases, this method resolves accumulated dirt stains without needing harsh products or much physical effort. The baking soda + vinegar combination works through effervescence that helps expel dirt from the pores, and the application sequence makes all the difference.
Before you start, three non-negotiable safety rules:
- Always ventilate the space: open windows or turn on the extractor fan before using any product.
- Wear rubber gloves for all methods, even homemade ones.
- Never mix bleach with vinegar, hydrogen peroxide, or any other product. The reaction produces toxic fumes.
Key Takeaways
The most effective method to start is baking soda + vinegar with a 10-minute action time, reserving bleach for intense mould and percarbonate for very dark grout where chlorine is to be avoided.
| Point | Details |
|---|---|
| Recommended initial method | Baking soda + vinegar with 10 minutes of action resolves most stains on ceramic and porcelain. |
| Chlorine only for mould cases | Diluted bleach (1:4) is effective against intense mould, but never on natural stone or coloured grout. |
| Percarbonate for deep stains | Dissolves in warm water, waits 15 minutes; cleans without chlorine and preserves the grout colour. |
| Sealant every 6 months | Applying a waterproof sealant after deep cleaning greatly reduces the recurrence of grime. |
| Cleaningpoint for difficult cases | For leaks, re-grouting, or post-construction in Lisbon, Cleaningpoint offers deep cleaning with diagnosis and specialized teams. |
Index
- Why does grout get grimy?
- What tools and materials do you need on hand?
- Step-by-step methods: which to use depending on the stain and surface
- When to reapply or replace grout?
- How to prevent grout from getting grimy again
- When to hire a cleaning or re-grouting professional?
- What DIY doesn't tell you about grout
- Professional cleaning when DIY no longer suffices
- Useful sources and additional reading
- Frequently asked questions
Why does grout get grimy?
Grout is a porous material. This porosity is useful during application, but later becomes your worst enemy: it easily absorbs moisture, grease, soap, dust, and microorganisms. Over time, what seems like just a dark stain can be a colony of fungi established within the pores, not just superficial dirt.
The causes vary depending on the room:
- Bathroom: constant humidity and lack of ventilation create ideal conditions for mould in grout and slime. Black mould is the clearest sign of deep microbial contamination.
The practical distinction is this: if the stain comes off with light scrubbing, it’s superficial dirt. If the dark colour persists even after cleaning, there is contamination in the pores. In that case, you need a method with a longer action time or a product with oxidizing power.
What tools and materials do you need on hand?
You don’t need to buy anything special. Most products are available in any supermarket in Portugal.
Tools:
- Medium-bristle nylon brush (the most suitable tool for manual joint cleaning)
- Old toothbrush for corners and narrow joints
- Microfiber cloth for drying and polishing
- Reusable spray bottle
- Bucket
Homemade products:
- Baking soda
- White vinegar
- 10-volume hydrogen peroxide (available at pharmacies)
- Sodium percarbonate (chlorine-free bleach, sold in cleaning product stores and some large retailers)
- Neutral detergent for delicate surfaces
- Diluted bleach, only for ceramic and porcelain in cases of intense mould
Personal protection:
- Rubber gloves
- Respiratory protection mask if using powdered percarbonate or hot steam
- Safety goggles when working with bleach or hydrogen peroxide
Professional tip: Before applying any product, always test in a hidden area, especially on shiny porcelain, natural stone, or coloured grout. Some products can irreversibly alter the finish.
Step-by-step methods: which to use depending on the stain and surface
Method 1: baking soda + vinegar (general stains, ceramic and porcelain)
The correct sequence maximizes the effect of effervescence.
- Moisten the joints with warm water.
- Generously sprinkle baking soda over the grout.
- Spray white vinegar on top. It will bubble, which is normal.
- Wait 10 minutes.
- Scrub with a nylon brush in circular motions.
- Rinse with warm water and dry with a microfiber cloth.
Total time: 20–25 minutes. Surfaces to avoid: marble, granite, travertine, and any natural stone. Vinegar is acidic and can permanently dull these surfaces.
Method 2: diluted bleach (intense mould and slime)
Bleach is effective against mould and slime but requires care in dilution and mandatory ventilation.
- Dilute 1 part bleach in 4 parts water.
- Apply with a spray bottle or brush on the affected joints.
- Wait 5–10 minutes (never more than 15).
- Scrub with a nylon brush.
- Rinse very well with plenty of water.
- Ventilate the space during and after application.
Total time: 25–30 minutes. Surfaces to avoid: natural stones, metals, coloured grouts (chlorine can fade). Gel bleach adheres better to vertical joints than the liquid version.
Method 3: sodium percarbonate (very dark grout, chlorine-free alternative)
Dissolved percarbonate in warm water releases active oxygen that penetrates the pores without needing much mechanical force.
- Dissolve 2 tablespoons of percarbonate in 500 ml of warm water (not boiling).
- Apply the solution to the joints with a spray bottle or sponge.
- Wait 15 minutes.
- Lightly scrub with a nylon brush.
- Rinse with water and dry.
Total time: 25–30 minutes. Safe for coloured grouts when used as directed. Wear a mask when handling the powder.
Method 4: hydrogen peroxide + baking soda (organic stains)
Useful for stains from fungi or organic matter on ceramic and porcelain. Always test in a hidden area first, especially on shiny surfaces.
- Mix 2 parts baking soda with 1 part 10-volume hydrogen peroxide until it forms a paste.
- Apply the paste to the joints with a brush or finger (with a glove).
- Wait 15–20 minutes.
- Scrub and rinse.
Total time: 30 minutes. Do not use on natural stone or mix with chlorine.
Method 5: steam cleaner
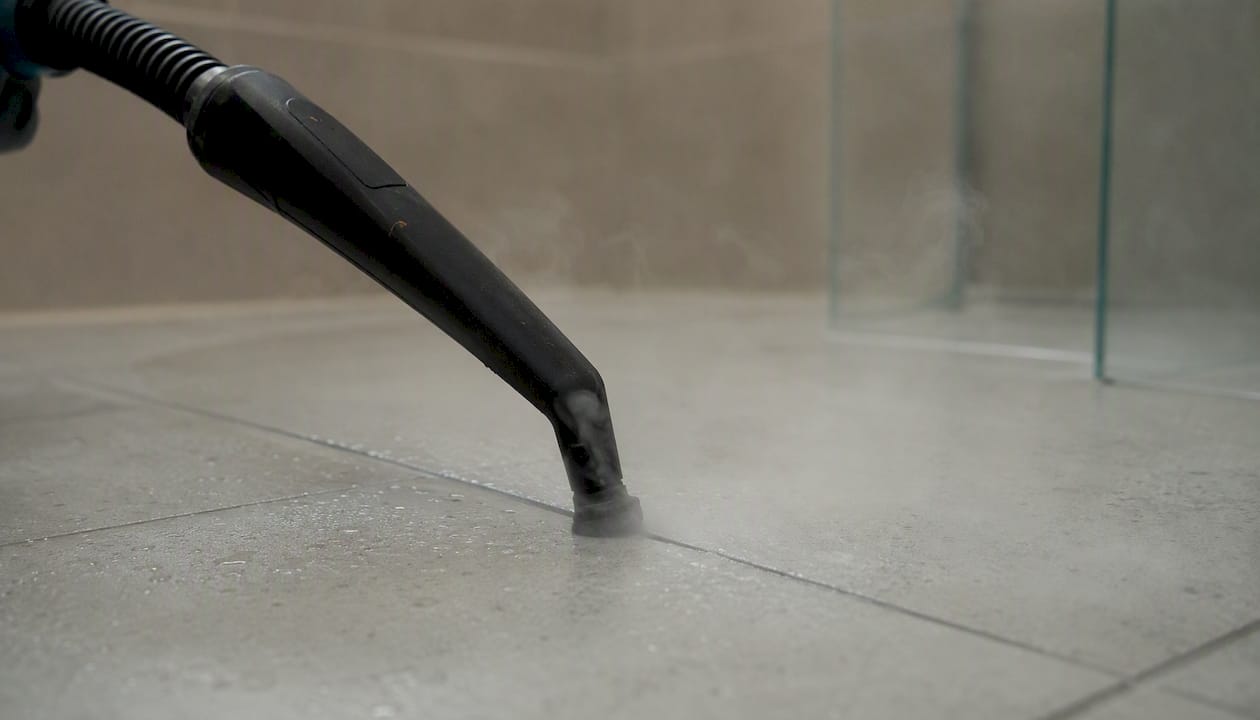
High-temperature steam loosens dirt in textured grout without chemicals. Effective for regular maintenance and for those who prefer to avoid chemicals. Keep the nozzle in constant motion to avoid concentrating heat in one spot. Not recommended for surfaces with silicone joints or waxed finishes.
Method 6: specific commercial products
When homemade methods fall short, there are commercial grout cleaners available in DIY stores and large retailers. Always read the label to confirm compatibility with your surface before applying.
| Method | Best for | Surfaces to avoid | Action time |
|---|---|---|---|
| Baking soda + vinegar | General dirt, light stains | Natural stone | 10 min |
| Diluted bleach | Intense mould, slime | Natural stone, metals, coloured grout | 5–10 min |
| Sodium percarbonate | Very dark grout | No relevant restrictions | 15 min |
| Hydrogen peroxide + baking soda | Organic stains | Natural stone | 15–20 min |
| Steam | Maintenance, textured | Silicone, waxed surfaces | Direct application |

Professional tip: Let the product act for the indicated time before scrubbing. Saving 5 minutes of waiting means 20 extra minutes of scrubbing.
When to reapply or replace grout?
Cleaning has its limits. There are clear signs that the problem is no longer dirt, but structural degradation:
- The grout is crumbling or has visible loss of volume in the joints.
- Dark stains return days after cleaning, even with effective methods.
- There is water infiltration behind the tiles or persistent moisture on the wall.
- The grout has lost colour unevenly and does not recover with cleaning.
If you recognize two or more of these signs, the solution is re-grouting, not more cleaning.
Basic steps for re-grouting (DIY):
- Remove the old grout with a plastic spatula or specific re-grouting tool. Avoid metal tools that could scratch the tile.
- Clean the exposed joint well and let it dry completely (minimum 24 hours).
- Apply the new grout with a rubber spatula, filling the joint well.
- Remove excess with a damp cloth before it dries.
- Let cure according to the manufacturer's instructions (usually 24–48 hours before wetting).
The cost of materials to re-grout an average bathroom is in an affordable range at DIY stores in Portugal, without specifying values. For large areas, post-construction, or when confirmed infiltration exists, hiring a professional saves time and avoids mistakes that compromise waterproofing.
How to prevent grout from getting grimy again
Deep cleaning loses its effect quickly without a maintenance routine. The good news is that maintenance is simple.
Weekly routine:
- Wipe a damp cloth over the bathroom joints after normal cleaning.
- Use a squeegee to remove excess water from the shower walls after each use.
- Do not leave wet towels on tiles.
Monthly routine:
- Spot clean the joints with baking soda and a nylon brush.
- Check for signs of mould starting, especially in corners.
Waterproof sealant:
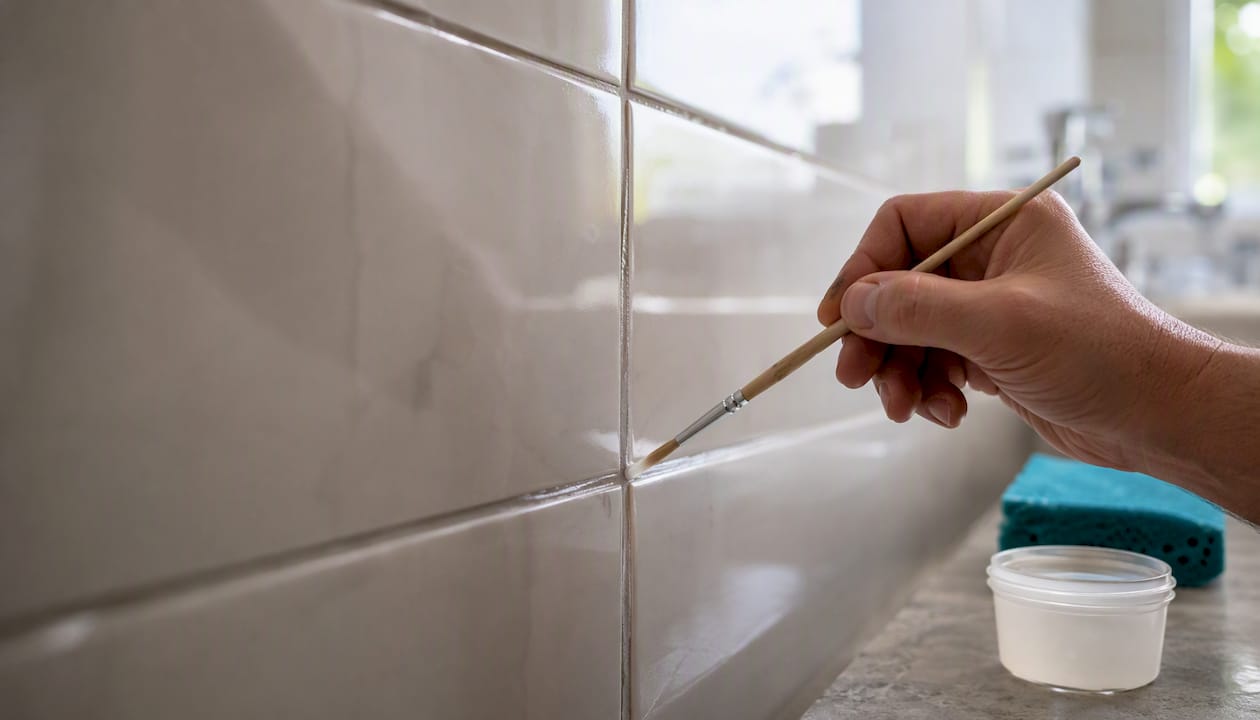
After a deep cleaning, apply a sealant for grout every 6 months. The sealant closes the pores and greatly reduces moisture and grease absorption. You can find specific products in DIY and construction material stores.
Ventilation:
Open the bathroom window or turn on the extractor fan during and after the shower. Accumulated humidity is the main cause of recurring mould.
Professional tip: Always apply the sealant with the grout completely clean and dry. A sealant over dirty or damp grout does not adhere well, and the result lasts much less.
When to hire a cleaning or re-grouting professional?
Some problems are beyond the reach of DIY, and recognizing them early saves money.
Situations that justify hiring:
- Confirmed or suspected water infiltration behind the tiles.
- Loose, crumbling grout or loss of adhesion in extensive areas.
- Post-construction work with hardened mortar and cement residues.
- Very large area where manual cleaning would be impractical.
- Stains that do not come out after two or three different methods.
What to expect from a qualified professional:
- Visual diagnosis and, if necessary, moisture testing before proposing a solution.
- Technical cleaning with professional steam equipment or extraction of deep stains.
- Re-grouting or application of sealant with products suitable for the surface.
- Clear information on curing time and post-intervention care.
How to choose wisely:
- Ask for references or verifiable reviews.
- Confirm that the company has liability insurance.
- Request a detailed quote before starting.
- Ask what products they use and if they are compatible with your surfaces.
- Inquire about the curing time after re-grouting and when you can return to use the space.
Cleaningpoint offers deep cleaning and post-construction services in Lisbon, with consistent teams and detailed checklists. For readers outside Lisbon, look for local companies with the same credentials: insurance, transparent quotes, and verifiable references.
What DIY doesn't tell you about grout
There is a comforting illusion in cleaning tutorials: the idea that the problem is always the product. Use the right product, and the grout looks new. In practice, what makes the most difference is the action time and the consistency of maintenance, not the strength or the most expensive product.
What I repeatedly see is people cleaning the grout once with a lot of effort, being satisfied with the result, and then having the same problem three months later. The cycle repeats because a sealant was never applied, and ventilation remains insufficient. Deep cleaning without maintenance is wasted work.
The other real limit of DIY is diagnosis. Knowing whether that dark stain is superficial mould or infiltration behind the tile is not obvious. Treating infiltration as dirt is a mistake that can be costly in future repairs. When in doubt, a professional with experience in moisture diagnosis is worth the cost of the visit.
Professional cleaning when DIY no longer suffices
When homemade methods do not resolve the issue, or when the work is too extensive to do alone, Cleaningpoint is the concrete alternative for those in Lisbon. The deep cleaning service includes treatment of difficult surfaces, post-construction cleaning, and removal of persistent stains with professional equipment, without you having to coordinate products, tools, or time.

The team works with detailed checklists, support in multiple languages, and access management, which is especially useful for property owners preparing for new tenants or after renovations. For readers outside Lisbon, the selection criteria remain the same: a company with insurance, transparent quotes, and verifiable references.
To schedule a cleaning in Lisbon, book directly here.
Useful sources and additional reading
To delve deeper into the methods and check the safety of the products, these sources are a good starting point:
- How to clean grimy grout? See 7 practical ways — detailed methods including bleach and post-construction.
- Baking soda and vinegar without chlorine or industrial products — explanation of the chemical reaction and application sequence.
- Percarbonate: cleaning without scrubbing until tired — usage and advantages of sodium percarbonate.
- Simple and practical tips from Home and Garden — homemade recipes and prior tests on porcelain.
- Mistakes to avoid and safety tips — list of common mistakes and safety guidelines.
- Cleaningpoint — services in Lisbon — deep cleaning, post-construction, and regular home care.
For chemical products (bleach, percarbonate, hydrogen peroxide), always consult the safety data sheet (SDS) available on the label or the manufacturer's website. Public health entities in Portugal, such as the Directorate-General for Health, provide guidelines on the safe use of household cleaning products.
This article is for informational purposes. For situations of infiltration, structural damage, or questions about product compatibility with specific surfaces, consult a qualified professional.
Frequently asked questions
How to effectively clean grimy joints?
Sprinkle baking soda over the damp joints, spray white vinegar, and wait 10 minutes before scrubbing with a nylon brush. For intense mould, use diluted bleach (1 part to 4 of water) with mandatory ventilation.
Does vinegar damage grout or tiles?
Vinegar is safe for vitrified ceramic and porcelain for occasional use, but should not be used on natural stone like marble, granite, or travertine, as it can permanently dull the surface.
What is the best product to clean grout without scrubbing much?
Sodium percarbonate dissolved in warm water is the most effective option: apply, wait 15 minutes, and the active oxygen does most of the work, with less physical effort and no chlorine.
When should I call a professional for grout?
When there is water infiltration, crumbling grout in extensive areas, stains that do not come out after several methods, or post-construction work with hardened residues. Cleaningpoint offers this service in Lisbon with diagnosis included.
How often should I apply sealant to the grout?
Apply waterproof sealant every 6 months, always with the grout completely clean and dry. This routine closes the pores and greatly reduces moisture and dirt accumulation.


